This past week I bought 10 pounds of strawberries. My purpose? DIY jam! 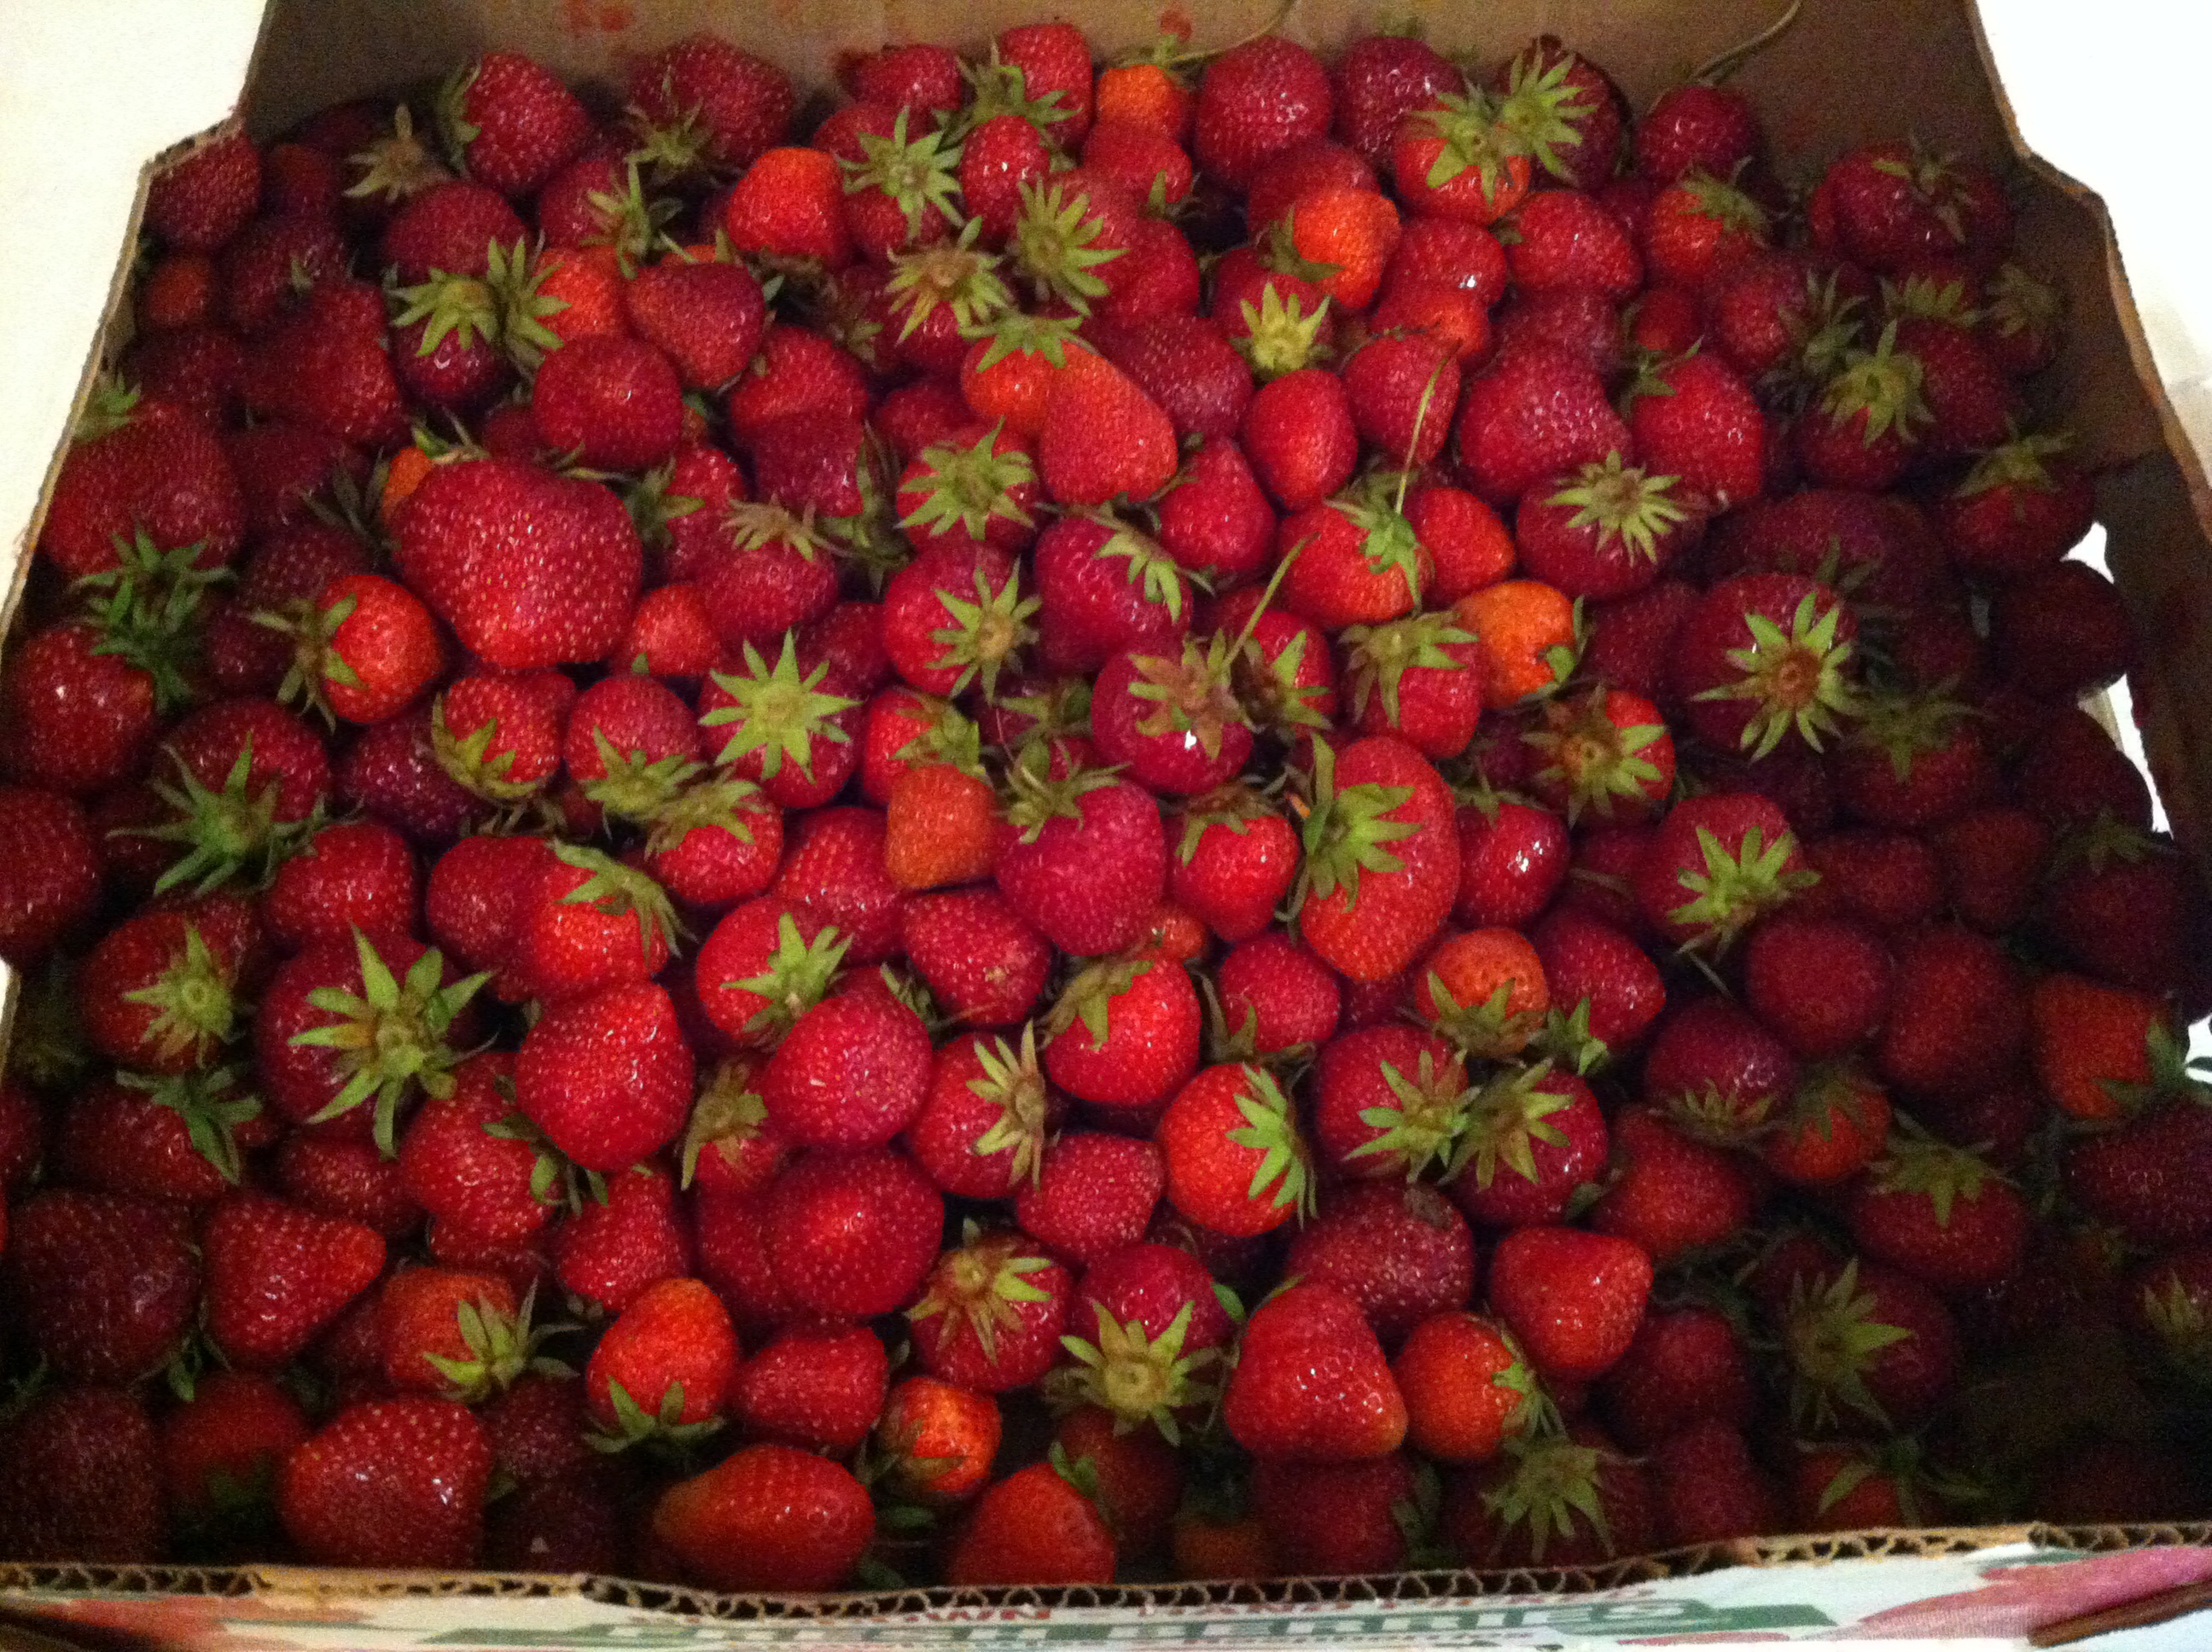
Some people get scared of making their own jam because they imagine standing over a huge pot, pulling jars out and waiting for the *pop* that tells you that your jars are officially sealed.
Today I want to share with you one of life’s greatest secrets: freezer jam.
My mother-in-law introduced me to freezer jam a few years ago (thanks, Lea!) and it has honestly been one of my favourite ways to save money. Now, don’t get me wrong, we don’t go through a ton of jam in our house, but it’s one less thing that I need to over-pay for. (I’ll give you the numbers breakdown later on in the blog)
So, I took my 10 pounds of strawberries and made a ton of jam, which is now in my freezer, and will sustain us until next strawberry season. It’s so easy, and honestly tastes so much better than store-bought jam. I’ll share my tips and tricks with you so you can make your own jam!
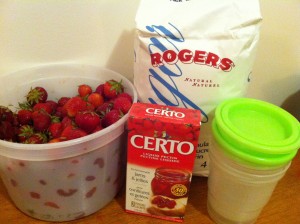
First of all, you pick up your supplies. You’ll need:
- Fruit (you can use any kind, and any combos, but my husband is a plain strawberry jam kind of guy)
- Pectin (I like Certo brand, but you can use any kind of freezer jam pectin)
- Sugar
- Lemon juice
- Jars (you can use plastic or glass jars, or even tupperware if you’re out of jars)
 Secondly, you’ll want to use the instructions inside the pectin package. Each kind has slightly different instructions, so make sure to read them. I’ll tell you how I used the Certo liquid pectin that I picked up.
Third, you’ll need to crush your fruit. I used my Starfrit food processor to crush up my strawberries after I cut the tops off. So fast and easy!
Trick #1: I use a Starfrit Manual Food Processor, a gift from my mother-in-law. It honestly makes crushing the fruit so easy! If you don’t have one of these, you can use a regular food processor or a pastry blender or potato masher (it just takes longer).

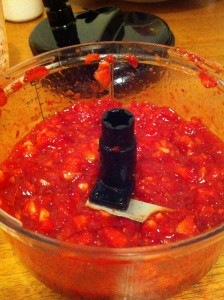
Trick #2: Chop all your fruit at once. It makes it easier, and your hands will get all sticky anyways, so it’s worth it to just do it all at once, crush it all at once, and just do each step at a time instead of chop, crush, chop, crush. I use a tall measuring cup or bowl to separate my chopped fruit.
Trick #3: Use a glass or metal bowl for fruit – a white bowl will be stained by fruit juice.
Fourth, you’ll need to combine the fruit, pectin, sugar and juice in a particular order with a specific amount of stirring and waiting involved. Again, check your own instructions. (I definitely ruined a batch of jam once by thinking I knew the right order to add things. Whoops! I ended up using it as strawberry sauce for ice cream, so it wasn’t a total loss.)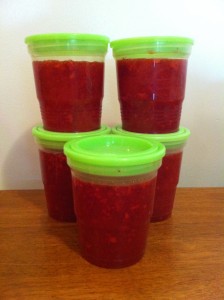
Now, you just have to wait for your jam to set, and you’re done! Once it’s set you stick it in the freezer until you’re ready for it.So convenient!
Trick #4: Wash your dishes and clean your counters right away. Strawberry juice stains in minutes, so do yourself a favour and tidy as your jam is setting!
Okay, now the moment you’ve been waiting for: the price and time breakdown.
Time:
Total time from first chop to dishes being done: Approximately 1 hour
Price for ingredients:
Sugar: $2
Pectin: $3 (for 2 pouches)
Strawberries: $6.67 (I bought a flat for $20 and used approximately 1/3 of it for this batch of jam)
Lemon juice: $0.25 (rough estimate)
Jars: $0 (I had a bunch in my cupboard, and because they don’t need to be sterilized for freezer jam, you can reuse with no worries!)
Total cost: $11.92
Total containers of jam made: 5
Cost per container: $2.38
Now, when I was in the store I looked at jam prices. Even if you go off-brand, you’re looking at $5 for a comparable container of jam.
Result? Better-tasting jam for 1/2 the price? Yes, please!
I can’t recommend making your own jam highly enough! Give it a try – you just might like it.
Feel free to connect with Classy Frugality in one of the following ways:
- Leave me a comment below to let me know if you make your own jam and what your favourite fruit/fruit combos are! (Or anything else you want to say)
- Follow or tweet me! (@classyfrugality)
- Follow me on Pinterest
- Subscribe to my e-newsletter so you never miss a post
*Disclaimer: This post contains an Amazon Affiliate link. That means that if you use this link to buy the product I recommend, I’ll get a little something to support the blog and our journey to becoming debt-free. No pressure to use it, I just wanted to warn you! Also, I was not compensated in any way to discuss this product – I just really like it.*