It’s pumpkin season! (In case you didn’t know.)
People all around are posting about making pumpkin EVERYTHING – not just pie, but muffins, bread, chili, pasta sauce, coffee, etc. etc.
So today I’m going to give you a quick little tutorial about how you can make your own pumpkin puree, which will save you money and will be healthier than what you can buy in the stores. I’ll also link up some money-saving pumpkin recipes at the end.
Ready?
(Note: I have used and adapted the recipe found at AllRecipes – feel free to check out the original!)
Step 1: Buy a pumpkin. In Canada, I could buy a pumpkin for just a few dollars. Also, sometimes people give pumpkins away on the side of the road because they have so many. Definitely pick one up if you see one! Give it a good scrub and you’ll be good to go.
Step 2: Cut the pumpkin into pieces. You’ll need a good sharp knife for this. Be careful! I cut mine down the middle and then cut it into 4 sections. 
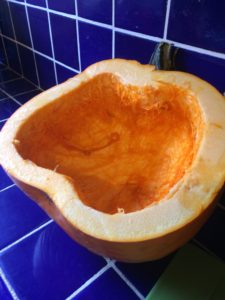
Step 3: Remove strings and seeds from inside the pumpkin. You can make your own toasted pumpkin seeds for a healthy, frugal snack later!
Step 4: Put pumpkin pieces in baking dish(es). Get a shallow baking dish (pyrex casserole dish or a baking sheet) and put a bit of water in the bottom. Place pumpkin pieces in the dish.
Step 5: Cook at around 325 degrees (F) for 1.5 hours. We have a gas oven, so mine only needed to cook for 1 hour. I checked it every 30 minutes.
Step 6: When you can easily put a fork into the pumpkin, it’s done! Take out of the oven and let it cool.
Step 7: After a few minutes, scrape cooked pumpkin off of the skin (rind). You can use a fork, a spoon, or your hands! It should easily peel off. It will look a little stringy. Take heart! Smooth pumpkin puree is coming your way.
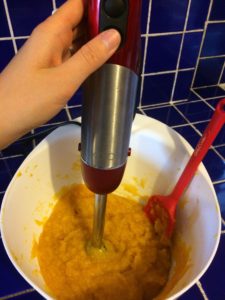
Step 8: Use a food processor, immersion blender, or blender to puree the pumpkin. I got this immersion blender for Christmas and I love it! It made pureeing really fast and easy. (And it’s only $30 – such a good deal!)
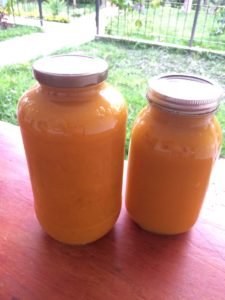
Step 9: You’re done! Put pureed pumpkin in containers or jars and use in any recipe where it calls for pureed or canned pumpkin.
What I like about doing this is that is saves a lot of money, and it’s not that time-consuming! Here’s how much time I spent:
- Prepping/cutting pumpkin: 5 minutes
- Removing seeds: 3 minutes
- Putting in oven: 2 minutes
- Cooking time: 1 hour (you can definitely do other things during this time – I did some homework in the kitchen so I could check on the pumpkin)
- Cooling time: 10 minutes
- Peeling off pumpkin and pureeing: 15 minutes
- Washing dishes: 5 minutes
- Total time: 35 minutes + cooking time
It’s definitely a bit more work than buying canned pumpkin, but if you use a lot of pumpkin, it’s a great way to save some cash with all of your pumpkin baking and cooking.
Speaking of which…
As promised, here are some excellent money-saving pumpkin recipes:
- Downeast Maine Pumpkin Bread – Guys, this bread is DELICIOUS! It makes 3 loaves, and it’s so moist and tasty. Make it as soon as you can! (It would also make a great frugal gift for someone in the holiday season.)
- Starbucks Pumpkin Scones (Copycat) – A fun thing to make at home, because who wants to spend $2.25 on a scone?
- Pumpkin Spice Latte – Another great way to save a few dollars this fall.
- 13 Must-Try Pumpkin Recipes – These are all on Pinch of Yum, a food blog that I love! I haven’t tried them, but I’m sure they are fantastic. Every time I make a recipe from this blog, I feel really fancy.
If you have any favourite pumpkin recipes or tips, feel free to leave me a comment below. I’d love to hear from you!
Note: Although there are a lot of links in this blog post, only one of them (the immersion blender) is an affiliate link. If you buy it using this link, I get a small percentage which supports the blog. However, if you find another food processor option, no hard feelings! I’m just sharing what I have experience with. Happy pureeing!
